More Dropbox Fun (FTP Access)
Tinkering
Dropbox is incredibly useful and I enjoy extending it's utility whenever I can. I also enjoy choosing projects that will teach me something new about my Mac. My latest project was to provide SFTP access to my Dropbox account. For security reasons, I am not allowed to install Dropbox at work. I considered several options for direct access to my files (email, webdav) but FTP is the most simple and universal access I could develop.
The Mac Mini Setup
There are many advantages to having an always on local server. In particular, it means the various Apple TV's in the house always have a movie library available without having to go to another room and start a computer. It also means I can tinker with server projects locally with a Mac rather than strangling myself with a remote unix server on Amazon or my web host.
To create a Internet accessible Mac server you will need to make some minor changes to your Mac and your broadband router.
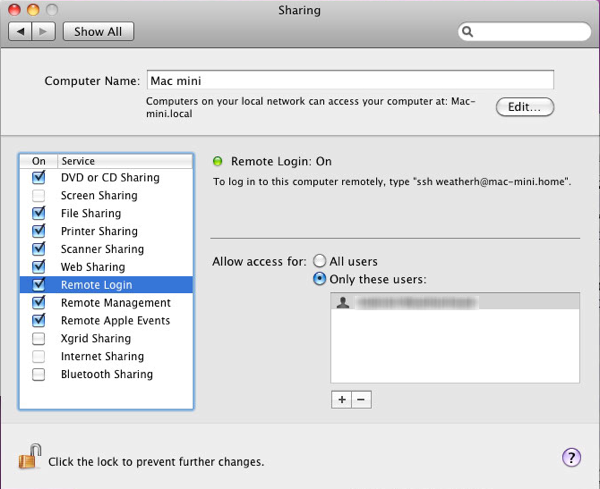
Open the System Sharing Preferences and turn on Remote Login. I limit access to a single user account for a bit of added security. I'm the only one that needs to access the server, so this works fine for me.

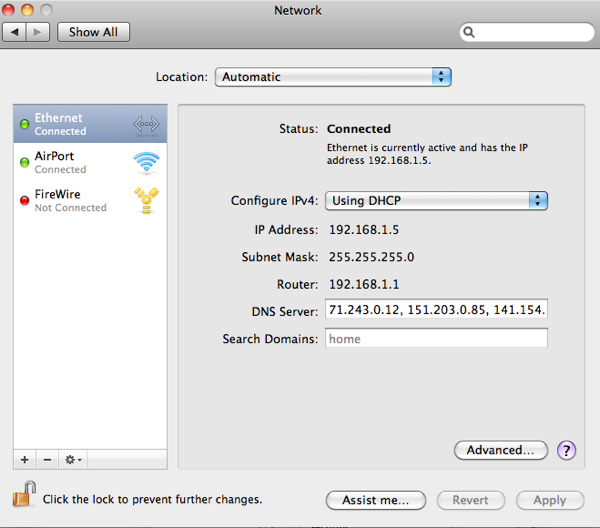
Open the Network Preferences and locate your IP address.

The Router
Connect to your broadband router and locate the Port Forwarding configuration settings. This will be different for every router. The main point is that this needs to be configured at the router that connects your home to the Internet. If you have additional routers between your computer and the broadband router, you may need to enable additional settings. My Mac Mini is directly connected to my router through a LAN.
Configure the SSH port forwarding on the router to go to your Mac Mini IP address. The SSH port is generally set as port 22.
While you are in your router's admin portal, write down the IP address of your router. This WILL NOT start with "192.168" but rather will be a unique IP address that your ISP is providing to your router. You will need this for the next step of this tutorial.

The Secret Sauce
Getting to your Mac Server on your local LAN is easy. Getting to it over the Internet is a bit more complicated but there is a very easy way to enable a DNS alias to your home Mac.
Go over to DynDNS and sign-up for a free account. From within your free account you can configure up to TWO new hosts. Importantly, you can choose host addresses that are memorable, rather than 10 digit IP address. For example, "myawesomeserver.dyndns.org." I use the "Host with IP address" option. This is where you will enter the IP address of your broadband router. Once complete, you should have a static IP address that now maps back to your Mac server at home. The only problem is, when your ISP changes your home IP address, everything will break.
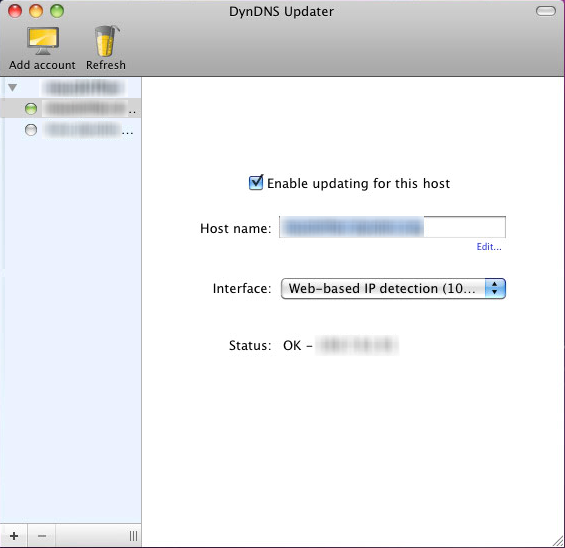
DynDNS has a nice solution to help resolve this issue. Go to the DynDNS Update Client page and download the Mac Updater. Install this on your Mac Server and enter your account credentials. That's about it. Make sure this application always starts up with the server. Now when your local IP address changes, the DynDNS Updater will notify the name server of the new address.

Finally, install Dropbox on your Mac Server.
Connecting
There are several options for connecting to your new server. SSH terminal connections give you direct access to the shell of the Mac. This is quite powerful. Unless you are accustom to using the terminal on your Mac, I do not recommend experimenting from a remote location. However, SFTP is a fairly safe way to access files on your Mac Server.
On windows, I use Filezilla for SFTP. It's far from the quality available on the Mac with Transmit, but it is free and simple to use. From within Filezilla, create a new server connection using the DynDNS host name you set up. Provide the user credentials that are defined for the Mac Remote Login settings. Finally make sure to use port 22 (which you mapped in the router settings). This port is generally reserved for SFTP connections.
That should be all you need to connect to your Mac. Now you can navigate to your Dropbox directory and manipulate files until your heart is content.
Voilà, Dropbox FTP access.
References
These are links I found useful or interesting while building this service.
http://www.macinstruct.com/node/152
http://www.maclife.com/article/howtos/how_build_your_own_online_cloud
http://www1.maclife.com/article/howtos/how_enable_ssh_your_mac
http://www.dyndnscommunity.com/questions/3849/mac-osx-snow-leopard-bt-homehub-2-and-ftp-server.html
