Keyboard Maestro Variables Get Pixel Measurement
I’ve written previously about Keyboard Maestro variables. Last time I showed how a variable in Keyboard Maestro could be used to create a push and pop mechanism for the finder. In that case the trick was to pass the variable into an AppleScript. Here’s another example using variables in Keyboard Maestro except this time I’m going to perform a calculation with variables right in the macro
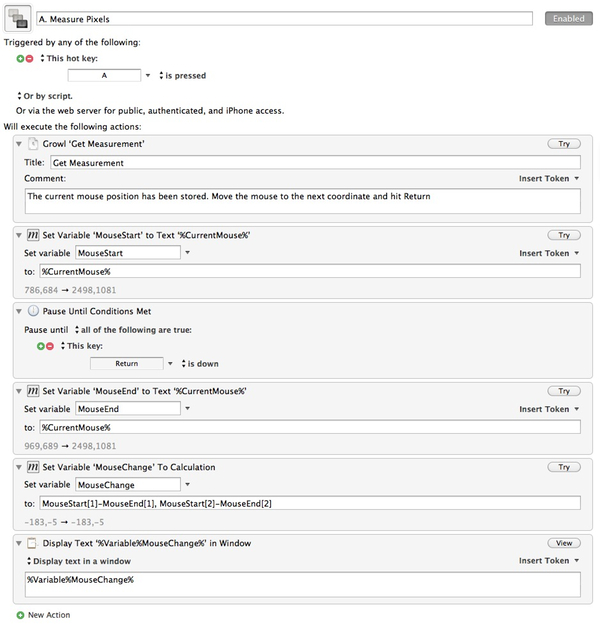
Here’s a macro to determine the change in coordinates of a mouse cursor. Placing a mouse cursor at one corner hitting the macro action and then moving the mouse and hitting return provides a text box with the change in coordinates of the mouse cursor. I created this after I needed to figure out how wide an onscreen object was. It’s not fancy, but it works and I don’t need another application installed.
When the macro is activated the current mouse coordinates are captured to a variable. Next the macro waits for the return key to be hit, at which time it captures the new mouse coordinates into a second variable.
Finally the macro performs the calculation with the two variables to determine the difference in coordinates for the cursor and displays the results in a text box. If I wanted to be more accurate, I could apply a ABS function to the results to get the absolute difference but I honestly don't care.
There are a couple of valuable features to highlight in this macro.
Variable Calculations
Keyboard Maestro variables are more than dumb text, which is what sets it apart from other tools. They can contain arrays and numerical values that can be manipulated in a calculation. For example I extract the first list item out of the variable by referencing the list position. The value in the list can then be used as either a string or integer as needed.
MouseStart[1]
KM variables are normally referenced through text replacement tokens and are surrounded by KM specific tags, for example:
%Variable%MouseChange%
However, when a variable is referenced in a calculation, the tags are omitted:
MouseStart[1]-MouseEnd[1], MouseStart[2]-MouseEnd[2]
This took me awhile to get used to [1] and I still mess it up.
A variable can store a list and each element in the list can be extracted with an appropriate pointer. For example “MouseStart[2]” gets the second element in the MouseStart list.
Pause Until…
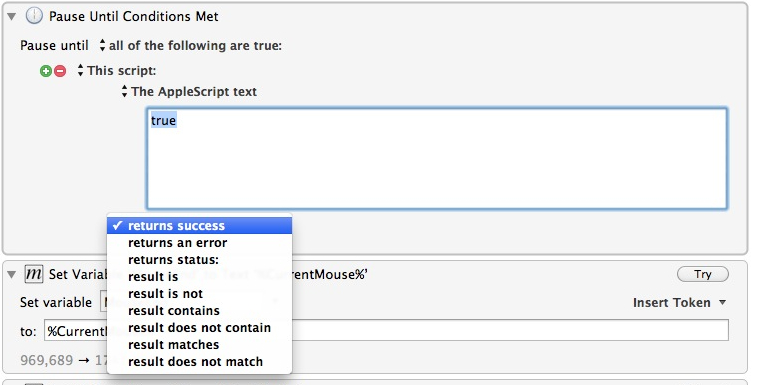
The “Pause Until Condition Met” action is very handy. There are several options available and they can be combined in several ways. In this macro, it causes the macro to sit and wait for the return key to be pressed before getting the second mouse cursor position.
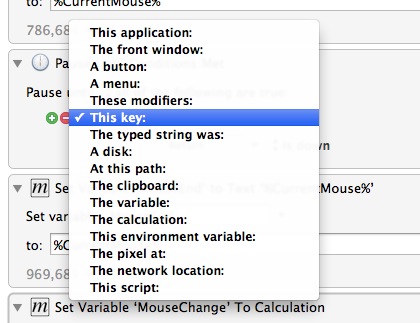
I can actually build some complex behavior with the new Keyboard Maestro 5 flow control actions. For example, pausing and waiting for a script to finish successfully or checking a network path before continuing.
I plan to make a future post all about the flow control actions since they are so useful.
-
And several emails to Keyboard Maestro support ↩