Window Management with Keyboard Maestro on macOS
macOS Monterey comes with some new window management tricks but they feel incomplete and a little frustrating. I have one suggestion for the Apple team that works on Spaces and window management: Get a big ass monitor. I did. It’s a gorgeous 38" display that makes me feel like I’m working on a space ship. It was surprisingly hard to adapt to so many pixels but I’m loving almost everything about it. Almost. Here’s what a 38 inch monitor looks like. Each of these windows is about the size of a 13" monitor:
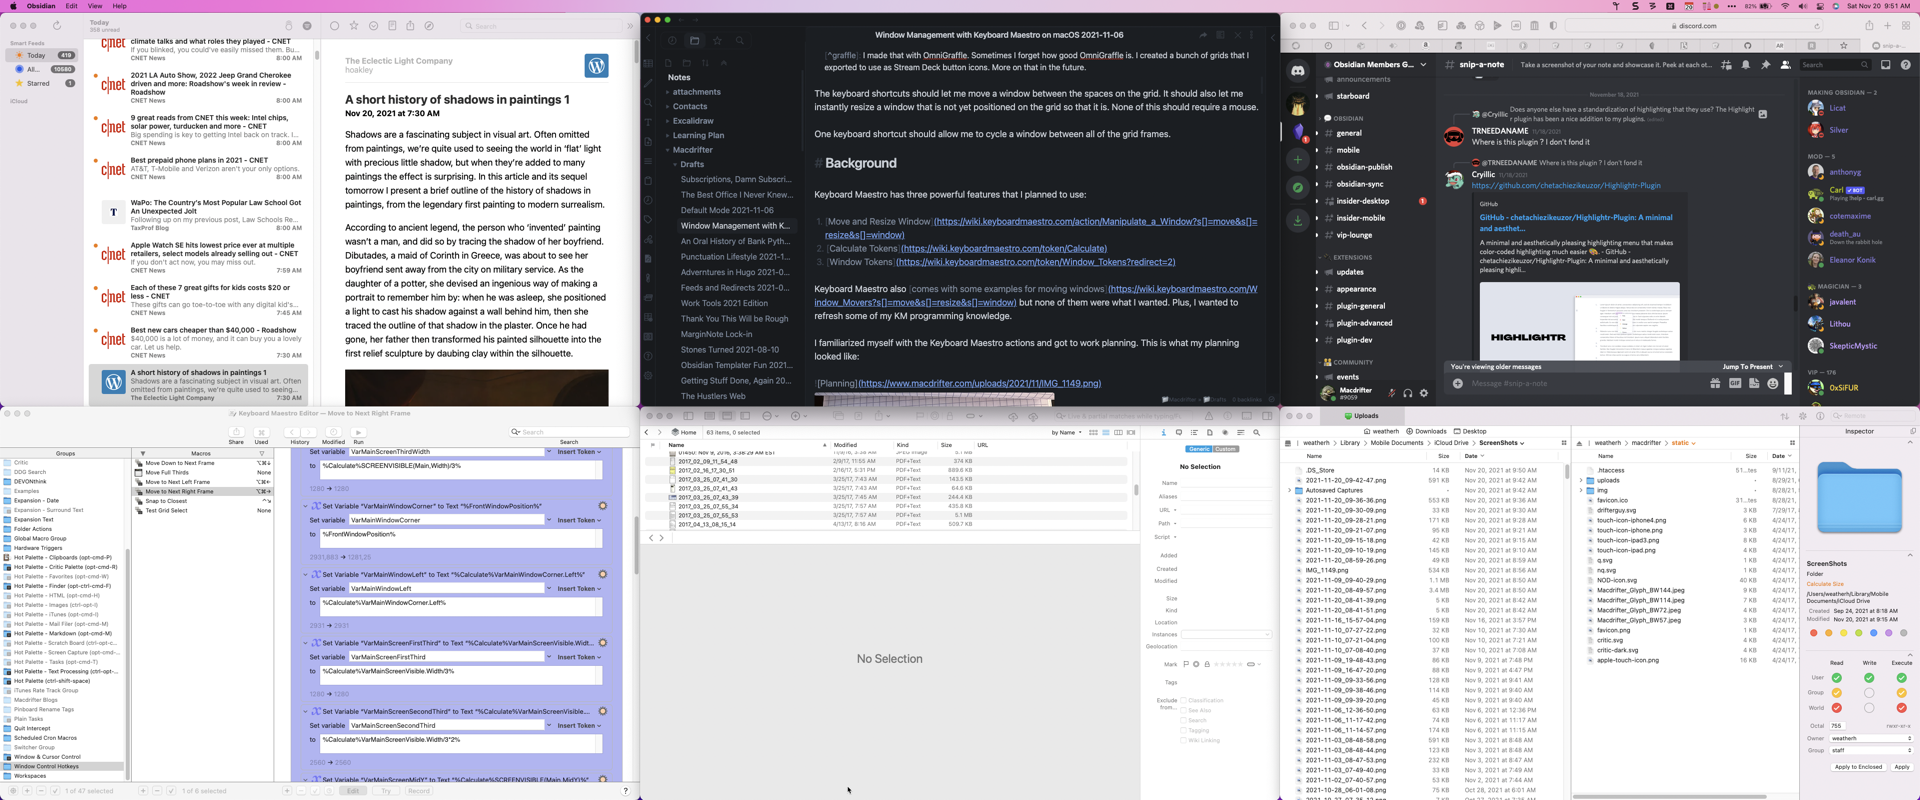
With so many pixels on screen dragging a window is very inefficient, which kills the utility of window snapping tools like Magnet or even BetterSnapTool and it’s big sister BetterTouchTool.1 When a window is on the right side of a 38" monitor and I want it snapped to the upper left corner, a mouse is the wrong tool.
I keep Moom running for occasional assistance but I decided I wanted to dive into the new Keyboard Maestro and some KM programming. So here it is.
Use Case
I’d like a set of keyboard shortcuts for moving windows around a grid on a large monitor. For a 38 inch monitor I like a 2x3 grid. It looks like this2:
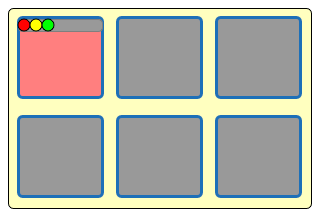
The keyboard shortcuts should let me move a window between the spaces on the grid. It should also let me instantly resize a window that is not yet positioned on the grid so that it is. None of this should require a mouse.
One keyboard shortcut should allow me to cycle a window between all of the grid frames.
Background
Keyboard Maestro has three powerful features that I planned to use:
Keyboard Maestro also comes with some examples for moving windows but none of them were what I wanted. Plus, I wanted to refresh some of my KM programming knowledge.
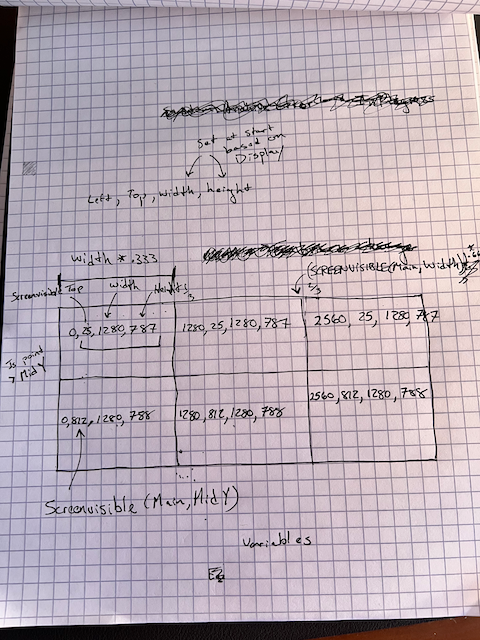
I familiarized myself with the Keyboard Maestro actions and got to work planning. This is what my planning looked like:
Snap to Closest Grid
I started by solving this problem first. When a window is just randomly thrown on screen I want a shortcut to make it fall in line with my grid. Here’s how I thought about the solution:
- What are the visible coordinates of the main screen
- Chop the coordinates up into a lower and upper half as well as vertically sliced thirds
- Figure out which grid location our window’s top left corner is sitting in
- Resize and move the window to the grid position that the left corner is in
I used Keyboard Maestro to help me figure out the grid coordinates. First up, I needed to know the coordinates of the visible screen. This is important because I don’t want to try to move a window under the menu bar. I used the %ScreenVisible%Main% token to get the coordinates of the visible screen. As you can see below the coordinates are 0,25,3840,1575.

There are a few additional KM screen calculations:
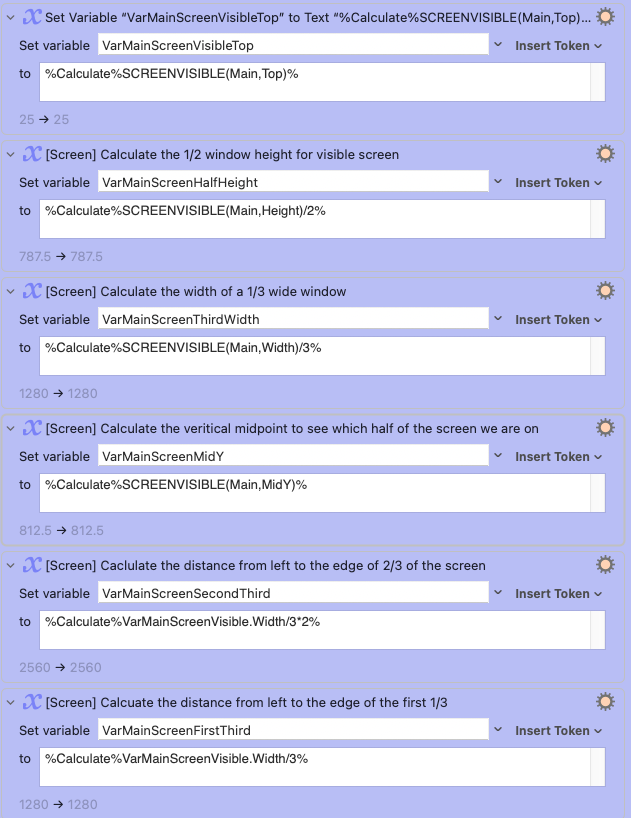
These are all saved to variables that represent specific X & Y regions of the screen. I think the neat thing about this is the KM %Calculate% function. It’s handy because it can calculate specific values of a screen or window. For example, %Calculate%VarMainScreenVisible.Width/3% calculates the Width of the screen divided by three. No need to add another action to do the math or to extract the width from the overall array of dimensions.
Now we start figuring out where our current front window is on the screen.
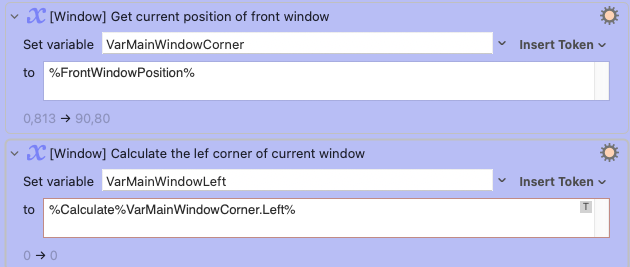
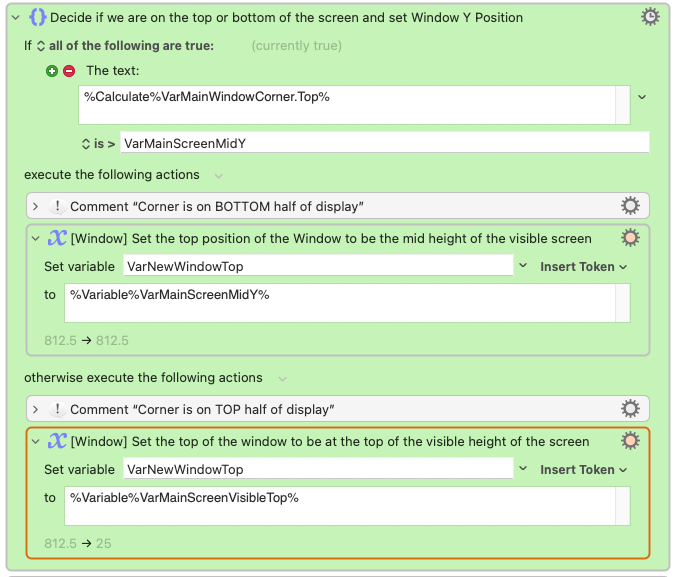
Great. Let’s start doing some logical tests of the window relative to the screen. This uses the Keyboard Maestro IF flow control. If the top corner of our front window is above the mid point of the screen then we probably want to snap to the top of the screen. If it’s below the midpoint then we want to snap to the bottom of the screen.
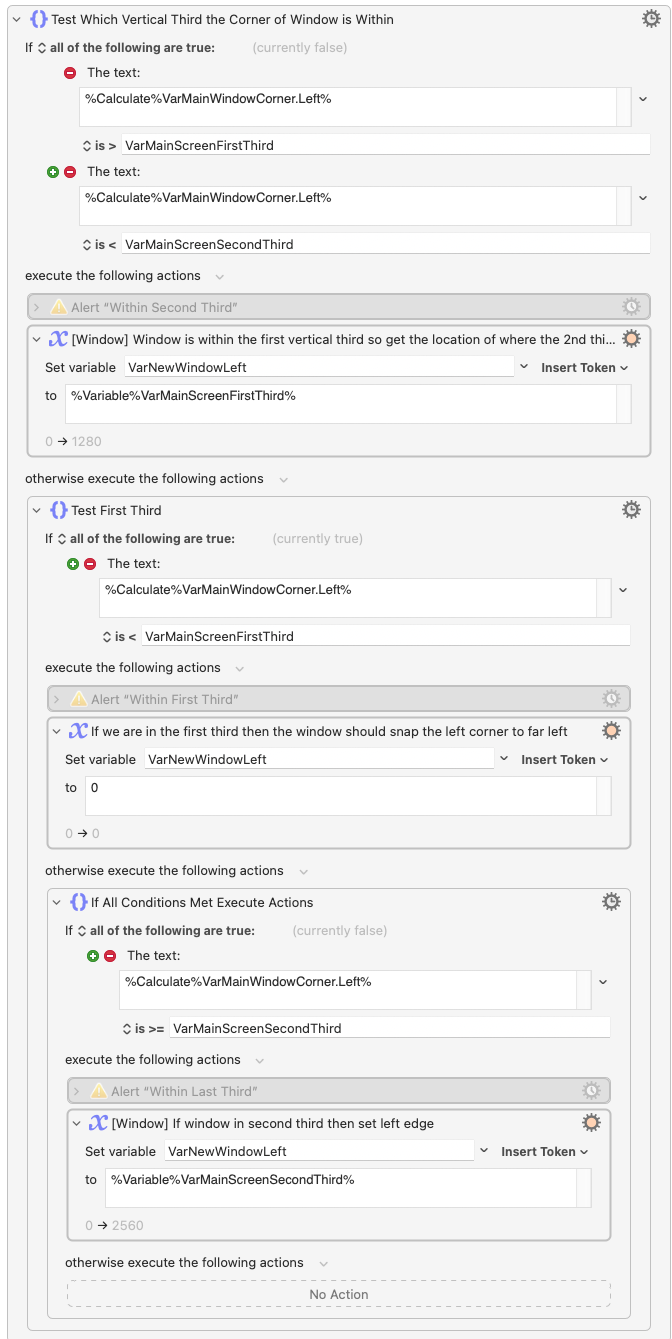
Now let’s figure out which third of the screen our current front most window is in.
We’ve done some math and some logical comparisons. Now it all pays off with one action to move and resize the front window using the variables in our IF statements. We know where I left corner should be horizontally and vertically and we know how wide and tall the window should be based on the visible region of the screen.

Here’s the entire workflow if you want to build your own:

Move to Next Left or Right Grid Position
This is the real money maker. It’s very similar to the previous macro. The main difference is that instead of moving the window to the closest grid location it moves the window to the grid position to the right. If we are at the right edge already it loops around to the left most grid position.

Conclusion
Hey, it works. These macros definitely reduce the amount of time I spend moving windows around. I can command-tab to an app and then hit CMD-Opt-RightArrow to move the window exactly where I want on my grid. I doubt the time these macros save will be more than the time I put into developing them. But that’s hardly the point. They make me slightly happier and I re-learned a bunch about Keyboard Maestro.
Backlog
The holidays are coming up so I should have more time to experiment with Keyboard Maestro. But, I still have more I want to do with these window manager macros.
- Detect screen dimensions and use 2x2 grid for smaller screens automatically
- Ask location to move window with keyboard nav
- Add a macro for a 1x3 horizontal grid, because sometimes I like tall and skinny
- Try out KM “Prompt for Screen Rectangle” action because that looks COOL.
- Try to show a grid overlay on screen to select locations to place windows.
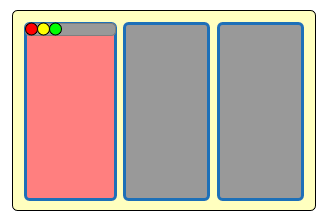
This is what a 1x3 grid looks like:
